About Me

My photo
A warm hello to all my readers. I am a mom of three amazing boys and a wife to a loving husband. I hope you enjoy this blog as a way to get new ideas for gifts, recipes, activities, and everything else in between.

Search This Blog

Sunday, September 20, 2015

Updated Living Room with a Traditional Twist

We are about 90% finished with our living room! The final piece just arrived and with a few screws the room will be complete. Until then however I wanted to share our most recent update: Wood trim on the wall. As a reference here is what the living room looked like to date: living room update

Using a guide from wainscoting of America we had our AMAZING contractor Dan from Testa Contracting interpret one of the wainscoting kits. Rather than the wood trim completely covering the wall, we used the wall and layered shadow boxes on shadow boxes. He built out the windowsills and made a wood trim window valance. We sprayed the entire wall with a high gloss white paint to add an extra element. Dan also installed four high hats - two on either side of the new chandelier. In a room where the light was MINIMAL at best, we now can see every detail with absolutely clarity. Rather than me fumbling the description I thought I would just show you how the process went with the art of I-Phone photography!

This is the BEFORE:
No Wood Trim and No chandelier or high hats.

This was one of the first layers of wood trim. You can see the crown molding, flat trim being added to make large and small rectangles, and the trim window valance.

Here are all the layers of trim- high hats installed- and the hand bevelled beadboard above the fireplace.

 This is Dan, his co-worker, and the "Foreman" Doc checking things out after the first coat of paint!

 Here is a glimpse of Dan painting and the BEAUTIFUL chandelier!


This is a close up of the beadboard above the fireplace. I love the way this turned out! He did such an amazing job. The beadboard is so simple yet elegant. 
 The last two photos below were taking with my back to the fireplace. The tall table lamps are from Restoration Hardware.


 Finally I have a fancy room to drink my "fancy" pickle juice martini's! Cheers Friends and a Big Thank You to Testa Contracting!


Thursday, September 10, 2015

First Day of Pre-K and Nursery School Teacher Gifts


Well the time has come for me to rejoice. The boys are headed back to school next week! We had a wonderful summer together and I know I will always look back to the dream team 2015 summer with fond memories but as they say,
 'all good things must come to an end' 
and as I say,
 "Mamma needs to regain her sanity."
 In preparation for the boys going back to school I had to take a little time to whip up a 
"Here we come! Look Out! Get Ready!" teacher gift. 
I always loved the sentiment of bringing your teacher an apple on the first day of school but as we all know, teachers do not want apples. 
So I went to the next best thing, Mini MacIntosh Apple Candles.


I love these little candles and here's why:
 #1: They are tiny so they are easy for a child to carry
#2: They are made in the U.S.A.
#3: You CAN NOT beat the price 
#4: They wrap so nicely in clear wrap and ribbon
#5: They may be small in stature but they are mighty in scent 

Attached to each of the candles I tied a hand written quotation on the boys stationary. 
I really love the way they all came together. 
Hopefully the teachers do too! 


Monday, September 7, 2015

How To Un-Spoil Your Children?

So the summer has come to an end ... After you read that what was your immediate feeling? Sadness? Joy? Did you just take a huge sigh of relief? My answer would be: Anxious. I am anxious for the school year to begin and completely stressed out by all of the little things I need finished before I can calmly begin a new season. You see I have one tiny... little... itsy bitsy... big... daunting thing I need to  do... I need to un-spoil my insanely energetic boys! How do I do that? Seriously I am truly asking: How do you make your child less bratty? Well that just sounds mean... less demanding of things? No, that's not right either... how about More appreciative? That's better.
You see over the past three months I have raced through so many emotions I should have been diagnosed with something ... now that summer is over and I am beginning to clear my eyes and mark up my calendar I have taken a good long look at my boys and noticed that I have created MONSTERS! I guess I took the "whatever you want" approach to life this summer a little too far... Remember Wedding Crashers when Gloria is tantruming at her sisters wedding... I am Christopher Walken in that scene just waving my hands saying "whatever you want..."
Last week I tried the whole "if you don't do this, you want get that" type of bargaining. It worked once on each child and then I was turning onto a dead end road. The "Cold Turkey" method usually works well in my life when it comes to my addiction to sweets... Maybe that will work with the boys too? No candy, no jinky junk toys, no baked goods, no more crazy hupla! What do you think? How long will it take to have my nice even tempered children back again? Have you gone through this before? I need some help on this one.

Monday, August 31, 2015

Annie Sloan Chalk Painted Kitchen Cabinets


Soooo....I painted our kitchen cabinets. I had done a little preliminary research prior to approaching Michael about making such a drastic change. I knew I wanted to use chalk paint on the cabinets purely for the fact that you do not have to sand or strip the wood prior to painting. After a little persuading, Michael finally agreed. With his "Yes" I tackled this project with full steam. I read as much as I could and watched Annie Sloan tutorials online. After finding a local retailer for the Annie Sloan paint I made the magic happen, the kitchen magic!
Michael and I both felt it was best to do a practice cabinet by painting and waxing the inside of a corner cabinet. So that is what I did. 
Here are the 10 steps I used to transform our kitchen:

1.) I cleaned the cabinet using a "Scrub Daddy Sponge"   Best Cleaning Sponge

2.) After the cabinet was free of grease stains, wetness, or any residue I opened my can of paint.  I opted to add 2 tablespoons of water directly into the paint can and mix it up. This paint is very thick and with the finish I was hoping to achieve I knew it needed to be thinned. 

3.)  I applied my first coat of Annie Sloan chalk paint in "Old White." 

4.) I applied the paint using both sizes of the Annie Sloan Flat Brush *These brushes are not cheap but they are well worth the coast for such a big project. The synthetic fibers really give a smooth finish while painting.

5.) After the first coat dried I applied a second coat, however this time before I brushed the paint on the cabinet, I slightly dipped my brush into a cup of water, then I painted smooth even strokes on the cabinet. Dipping the brush in water really helped to thin the paint enough to give a smoother finish. Here is how Annie says to achieve a smooth finish


Below are photos of the second coat:


6.) After the second coat of paint was dry, I sanded the cabinet. Annie says to sand after you clear wax but I opted to do both. I used a sanding brick to make things easier. 

7.) Then I applied my clear wax using the wax brush. I felt it necessary to wipe the wax again using a kitchen towel. The cabinet should not feel sticky or tacky in any way. 

8.) Once the clear wax had settled a bit I did some deeper sanding. I wanted to bring out the lines in the cabinets so I sanded them down. 

9.) Time to add some dark wax to bring out the wooden bits I just sanded! I used a very small amount of dark wax by dipping another rag into the wax, wiping it on the wood seams, then wiping it off immediately.

10.) Finally time to re-hang the cabinets! 


Here you can see where I sanded the edges of the wood. 


This is the cabinet front after 1 coat. 
This is after the second coat of old white. 


Many of you may be wondering how I completed this task with three little boys at home and the answer is a little help from "Bow-Wow" and "Rihanna"--- I let the boys do their thing while did mine! This project took me a 5 days to complete, 4 cans of paint, 1/2 can of clear wax, and 1/4 can of dark wax. 

 The second half of the cabinets I was able to finish because of my wonderful dad! He came over and picked the boys up on a Friday so I could finish up! He's the best! 

Wednesday, August 19, 2015

End of the Summer Babysitter Thank You Gifts


Shell says Farewell! Our Shell...she's the BEST! We have had such an amazing summer of fun playing outside, swimming, riding in jeeps, helping tow trucks, selling ice cream, and having tea parties with you! We love you and we are so proud of you! 

To say thank you the boys gave Shell a little bag of goodies to get her excited for her first day of work...

Color Block Bag: This pouch could totally transition day to night as a clutch or it can absolutely be the shiniest pencil case ever! 

Lip Gloss : Donut Lip Gloss! Yes Please! Who wouldn't want to be friends with the new girl at work if she pulled out a donut lip gloss!?!? I think it says 'all good things' about you...

Fun Erasers : Since soccer took over her Wednesday nights and she taught me everything I need to know about the game, these puzzle erasers scream your name!

Super Fun Pens: Queen of the color code...enough said! 

Hopefully... "The Best Travel Activities for Toddler Boys"

***** Update ****


**** Update to this post: My boys absolutely loved the popsicle sticks and Velcro! We were able to play with them while waiting for our flight. 
I have to say the best idea, aside from two video rentals on their Kindles, was little baggies filled with candy...I "hid" four small snack sized baggies in their backpacks so every so often they would find gummy worms or swedish fish or a dum -dum... Also for the flight home I switched their books and I put a new coloring book in each of their bags!  ******

We are headed out of town to visit family and to be perfectly honest, I am a tad nervous... Family of five checking in for a 2.5 hour flight and an additional car trip: Yes Please! Sign Me Up!
My entire family is thrilled to go on a vacation and I know once we are there all will be well in the world (until we have to travel home)...but for now I have scoured the inter -webs to find the best ideas bloggers, moms, and Pintrest has to offer! 
Once home I will do a follow-up post as to what really worked and what was a complete disaster...

So here is what we have: 

The boys bags are packed! We are all carrying - on! These little gems came from Pottery Barn Kids. 
The boys love them because they remind them of Michael's gym bag - so they feel 'cool like daddy.'


I headed to Target and went directly to their $1-$3 aisle. I found these super cute pencil cases and filled them with a pen, a rubber snake, and some connector blocks. I also picked up a Teenage Mutant Ninja Turtles note book for them to write/draw. 


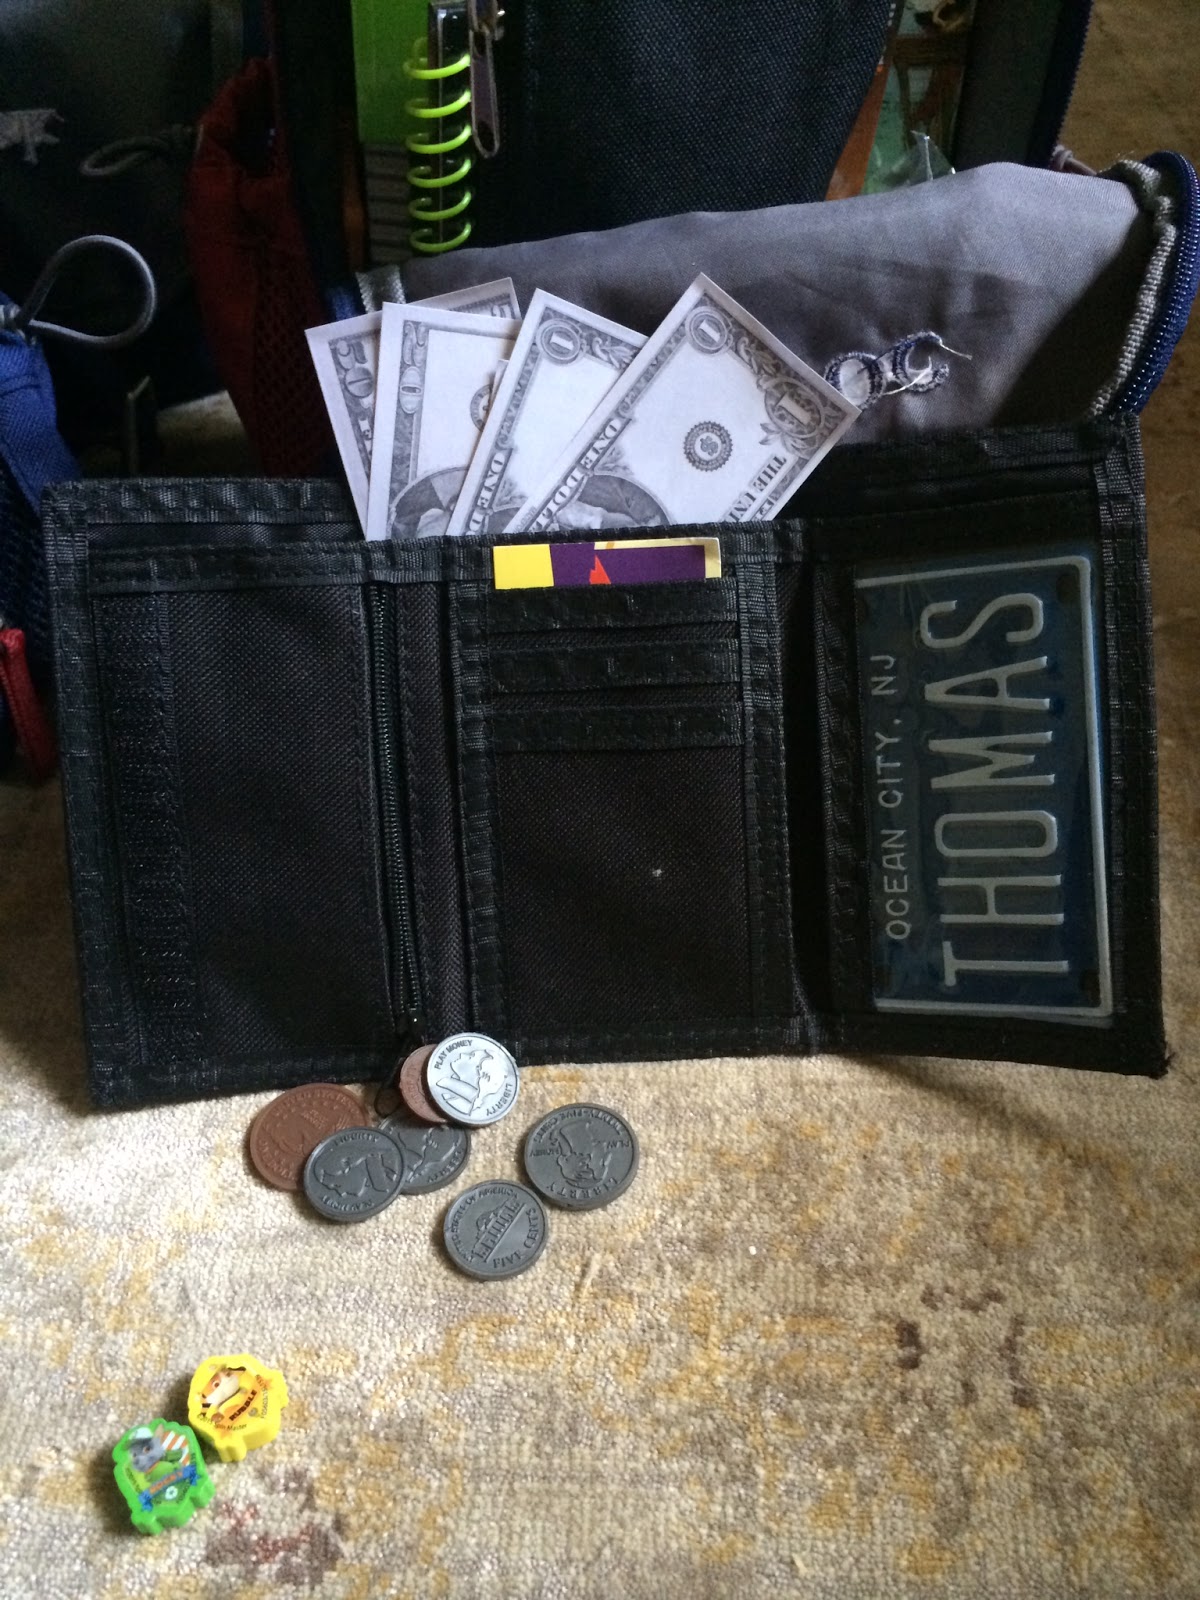
Over Memorial Day weekend, the boys won these Avengers Velcro wallets so taking the idea from Armelle Blog I made them a "Busy Wallet." I filled it with some play money, a few pictures, and some old gift cards. 


Also inside their backpacks I let the boys pick out a handful of "guys." These are Jack's. He chose all Paw Patrol Pups! 


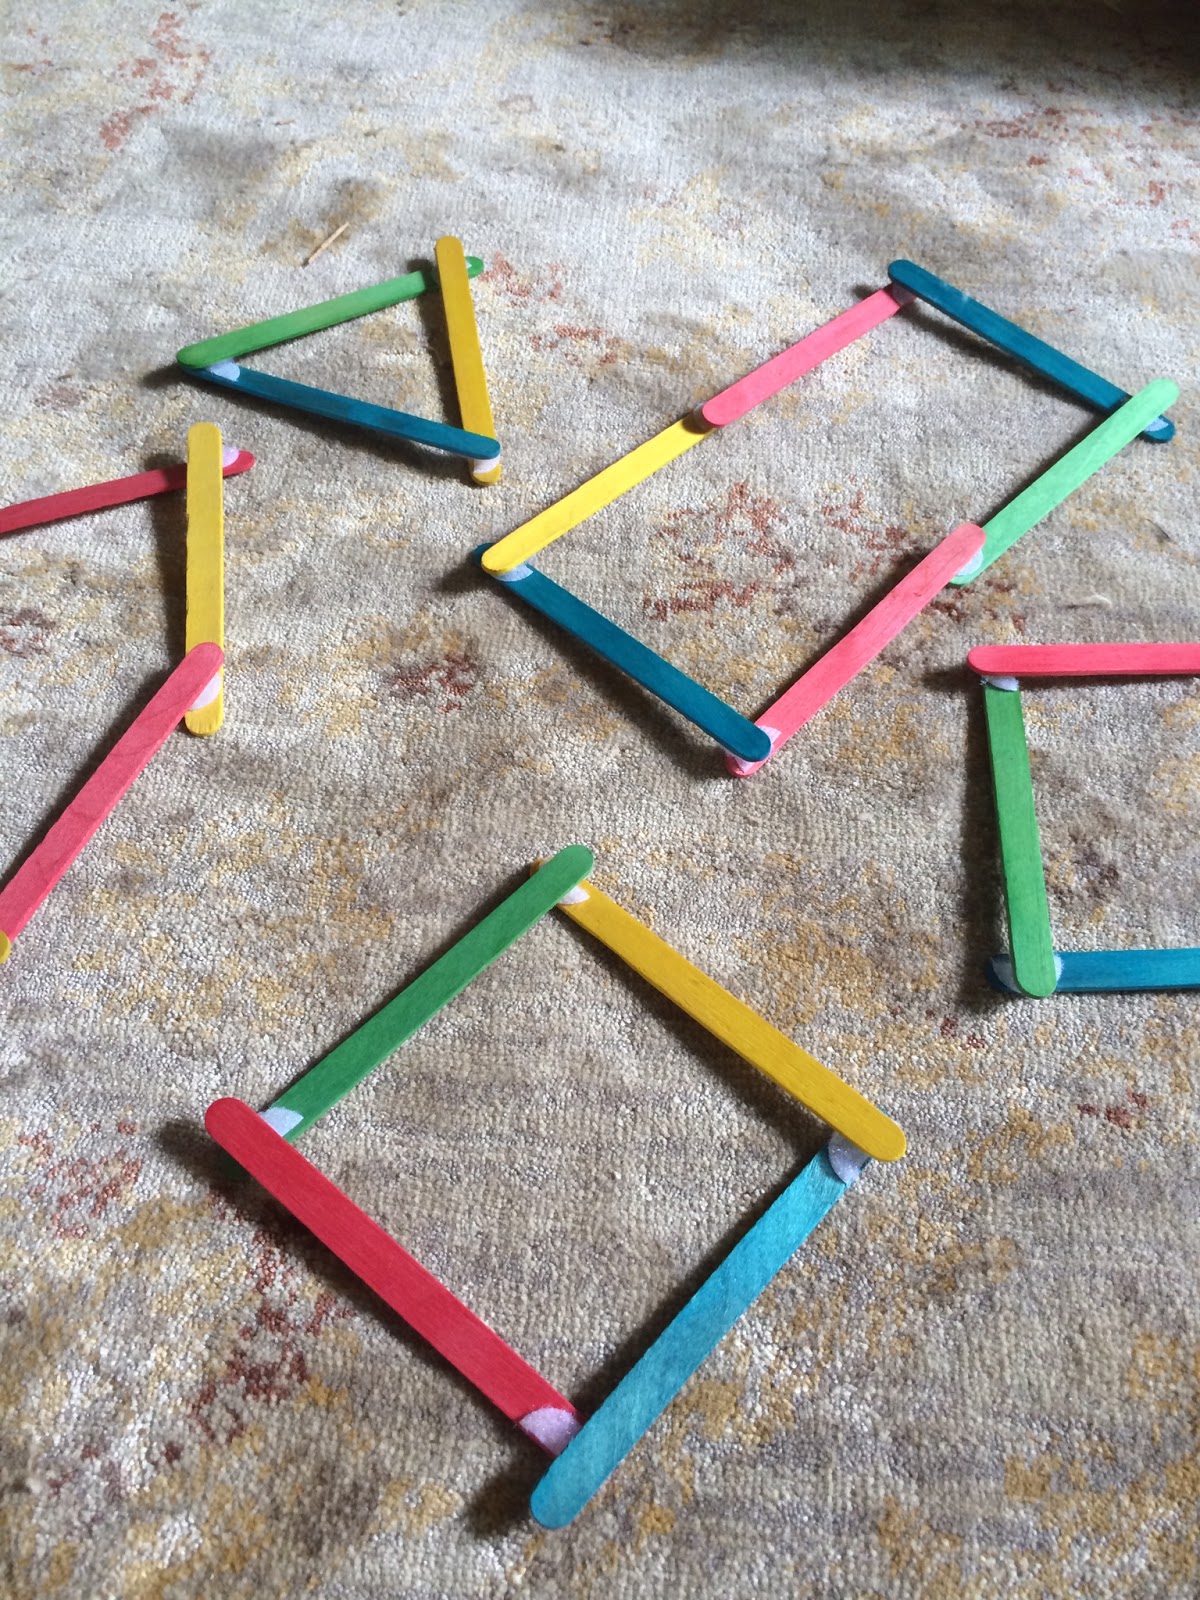
This has to be my favorite craft we have packed! I really hope this entertains the boys as much as I think it will. 
Desert Chica posted this idea and as soon as I saw it I knew I had to make these! Not only do I love this craft for travel but I love it for home. The boys can practice making shapes, patterns, counting, building their imaginations and everything else in between! Because my hardware store only had large velcro circles I ended up cutting them in half. On one side I placed a soft piece and on the flip side at the opposite end I placed a scratchy piece. In the third picture you can see what I'm describing on the two green popsicle sticks. 


In my carry-on I will be bringing applesauce pouches for the boys to eat/drink during the take-off and landing. I also picked up a pack of strawberry juicy fruit gum (but they only get a piece if they are being super good!) I also have crackers, little packs of fruit snacks, flash cards, and a baggie full of large legos...When all else fails I'm going right for the Dum- Dums and the Ninja Turtles crayon/coloring book sets I snagged at Target! 


Botanical Prints Courtesy of Magnolia Homes

This post is a HUGE thank you to Joanna Gaines for posting this DIY Botanical Print blog post! I needed a little help from my amazingly talented sister- in- law Meredith with sizing and enlarging but all in all this was so easy! I even had a few extra 8 x 10 prints made of the Lemon Botanical to use as housewarming gifts...Love Love Love me some botanical prints! 
Thank You Jo and Mer!